Best Way to Beat Legendaries in Pokechill: Battle Guide
A repeatable plan for scouting the encounter, preparing a useful team, and turning a failed attempt into one clear next move.


The best way to beat legendaries in Pokechill starts with scouting
A legendary fight is easier to plan when you inspect it rather than chase a tier label. Before changing your roster, record who is present, visible moves and status, and the first point where your run fails. That evidence tells you whether to test coverage, durability, a safer lead, or a different order.
Build around roles, not a copied six-Pokemon list. Use a reliable main attacker, an alternate answer, and support or recovery if your items allow it. Note the first turning point and change one variable. This adapts to your roster without claiming every legendary shares stats, moves, unlock rules, or weaknesses.
A five-point readiness checklist
Use this review before spending more time or resources on another attempt. Separate details you can verify in the game from assumptions copied from another Pokemon title.
Know the target
Confirm the route or encounter you are facing. A familiar species may not use the same rules in every game.
Read your evidence
Inspect visible moves, status, party details, and items before naming the cause of a loss.
Give slots a job
Choose damage, alternate coverage, durability, or support instead of overlapping attackers.
Change one thing
A controlled retry shows whether a new lead, move, teammate, or item helps.
Protect resources
Confirm what the game allows and avoid spending rare items on a guess.
Scout the encounter before choosing counters
Pokechill's guide describes inspecting areas, trainers, moves, status, teams, and items. Check those details before searching for a counter. If something is hidden, mark it unknown; do not fill the gap with Pokemon GO advice or rules from another version.
Write down the first point where the battle turns. Record any displayed move or status, the active member, and whether your move was ineffective, too slow, or unable to keep the party standing. This is more useful than “the team is weak.”
| Signal to inspect | What to check | How it changes your plan |
|---|---|---|
| Encounter identity | Route, trainer, or event label shown now. | Ties advice to the fight you are facing. |
| Moves and type clues | Visible moves, types, damage messages, or effectiveness feedback. | Suggests coverage to test; it does not prove an unseen move set. |
| Status and survival | Displayed conditions and the point where a member falls. | Helps separate a status problem from damage or durability. |
| Your options | Party details, moves, items, and available inspection. | Limits changes to choices the game provides. |
Build a flexible team instead of copying a universal roster
A useful team has more than one way to contribute. Choose a consistent main attacker, then add a second answer for when the first is a poor fit. Other slots can cover defense, support, or reserves. Species depend on your collection and the encounter, so roles matter more than a static counter list.
Use type coverage, but do not make type the whole plan. The official guide explains that stats, IVs, abilities, and moves affect performance. Check your candidates: a high tier does not fit every fight, and a lower-ranked Pokemon may fill a missing role.
| Team role | Useful job | What to verify |
|---|---|---|
| Primary attacker | Makes reliable progress against the encounter. | Confirm its moves and that it stays active long enough to contribute. |
| Alternate answer | Covers a different type or damage pattern. | Choose an inspectable move, not a theoretical species counter. |
| Durable slot | Gives the party another chance to act if a fragile member falls. | Use displayed stats and observed survival, not assumptions. |
| Support | Uses available utility to stabilize the attempt. | Plan around a function that appears in your version and inventory. |
| Flexible reserve | Replaces the slot that failed without rebuilding the party. | Keep a candidate ready, but test before spending scarce resources. |
Prepare the team and resources before you start
Check each party candidate's available moves, displayed stats and IVs, ability if shown, and overlap with other members. You do not need perfect stats; choose one improvement that addresses the observed failure. If your attacker already contributes consistently, another slot may need attention.
Confirm an item's effect and cost before using it. Items and Genetics cannot replace diagnosis. Save rare resources when the encounter is unclear, consult the game guide, and try a low-cost test first.
- Check moves. Confirm the move is available at this stage.
- Review stats and IVs. Treat them as clues, not perfection requirements.
- Plan the order. Choose a dependable lead and an alternate role.
- Confirm items. Use effects and costs shown in your version.
- Set a test goal. Track one result, such as surviving longer.
Run one controlled attempt and record the result
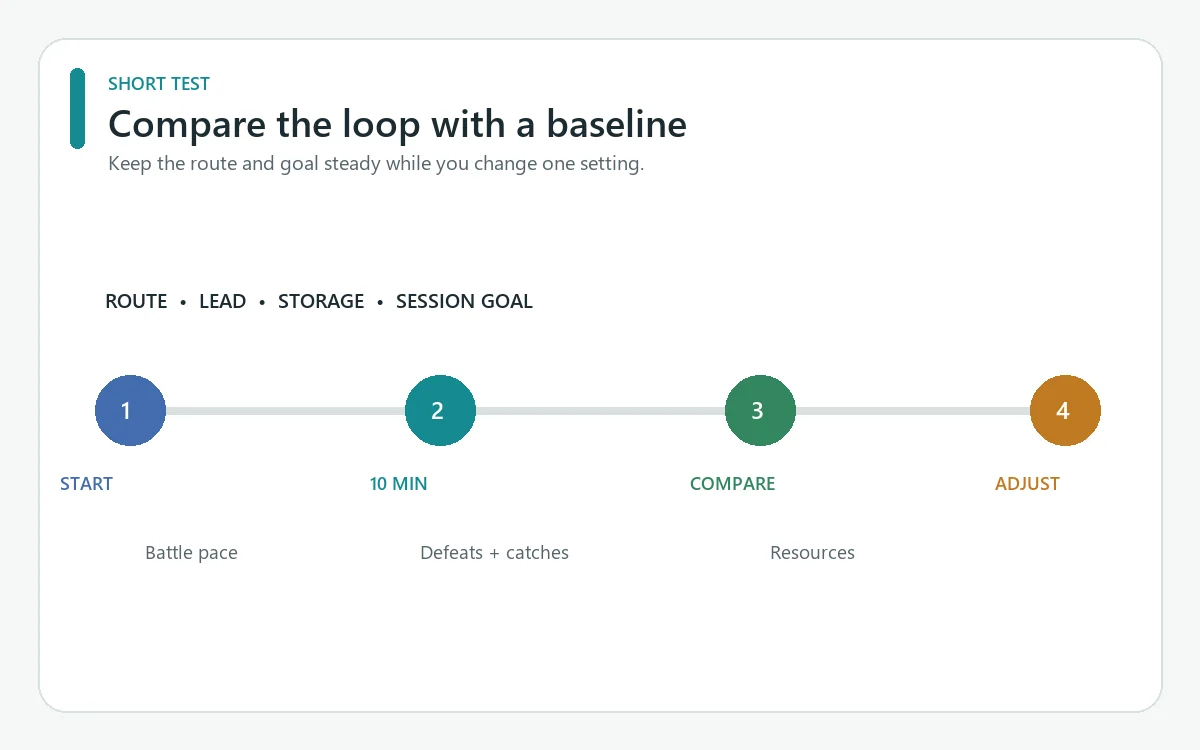
An attempt is useful even if it loses because it gives you a comparison point. Start with the prepared team and order. Do not change the whole party, moves, and item plan together; you will not know why the result changed. Record the first difference and the game's wording for any move or status.
Compare the result with the previous run. Did the lead last longer, did the alternate contribute, or did a status interrupt the plan? Keep a useful change, revert a harmful one, or test another slot. Repeating without notes produces little information.
Read what the game exposes.
Give each slot a job.
Change one factor.
Keep or undo the change.
- Keep the opening simple. Use an evidence-based lead, not a guessed weakness.
- Observe the failure point. Note the active member and displayed event.
- Make one adjustment. Change a lead, teammate, move, order, or item.
- Compare like with like. Keep other choices consistent.
- Stop when evidence runs out. Check a current source instead of guessing.
Diagnose the failure point before you rebuild
Use these patterns as troubleshooting prompts, not guaranteed causes. Confirm each idea against what your own battle displayed.
| What you observed | Possible issue to test | One next test |
|---|---|---|
| The same member falls at the same point. | It may not survive the damage or status shown there. | Try a more durable candidate in that role and compare progress. |
| Your main move makes little progress. | The move or matchup may be a poor fit; confirm the cause in-game. | Inspect one alternate move or attacker and test that change. |
| A status effect interrupts the team. | The party may lack an available response or support plan. | Check the condition and items, then test one documented response. |
| A replacement helps early but fails later. | It may solve one problem while leaving another role open. | Keep the useful change and adjust a different slot. |
| Results vary between attempts. | The route, party, move order, status, or another visible detail changed. | Record the setup and repeat only when comparison is meaningful. |
Save useful changes with the encounter and party order. Revert a harmful test; it still narrows your choices. Recheck after a route, patch, roster, or move changes.
Use the Best Team Guide for general party design and the Lance guide for that named encounter. Neither proves that a legendary shares its matchup.
What current sources do and do not confirm
The official Pokechill guide explains inspection and mechanics such as stats, IVs, abilities, moves, status, teams, and items. It is a reference, not a legendary counter database. Familiar Pokemon names do not guarantee identical rules across games.
This page does not claim a complete roster, unlock requirements, hidden moves, catch or drop rates, or a universal best team. It does not borrow Pokemon GO counters. Verify the encounter in your current game, use displayed evidence, and leave unconfirmed details unknown.
Pokechill legendary battle FAQ
What is the best way to beat legendaries in Pokechill?
Inspect the encounter, build a role-based team with an alternate answer, check visible moves and status, then change one factor after each attempt. Game-specific evidence matters more than a copied counter list.
Is there one best team for every Pokechill legendary?
The sources reviewed do not establish a universal team. Let your roster and the current encounter's visible moves or status determine the next test.
Can I use Pokemon GO legendary raid counters in Pokechill?
Do not assume they apply. Pokemon GO and Pokechill are different games. Treat an outside counter as unverified unless it matches mechanics shown in Pokechill.
Should I max IVs before trying a legendary battle?
Not automatically. Find where the attempt fails, then consider IVs alongside moves, stats, role, and observed behavior. Improve the slot that addresses a verified weakness.
How do I find a legendary in Pokechill?
The reviewed sources do not confirm a complete roster or universal unlock path. Check current in-game route or event information before relying on a specific requirement.
What should I change after losing?
Record the first visible failure point and change one factor, such as the lead, one team role, a move, or an available item. Compare controlled attempts.
Game mechanics reference
- PokeChill Game Guide and Wiki Used for documented inspection controls and explanations of stats, IVs, abilities, moves, status, teams, and items. It does not supply a universal legendary counter list.